

1. Botanical Details and Varieties:
- Botanical Information:
- Genus: Chlorophytum
- Native to Southern Africa
- Known for long, arching leaves and small white flowers that develop on long stems, often giving the appearance of spiderettes (hence the name “Spider Plant”)
- Popular Varieties:
- Chlorophytum comosum ‘Vittatum’ (Variegated Spider Plant, with green leaves and white stripes)
- Chlorophytum comosum ‘Variegatum’ (Similar to ‘Vittatum’, but with more distinct yellowish stripes)
- Chlorophytum comosum ‘Bonnie’ (Curly Spider Plant, with unique curled leaves)
- Chlorophytum comosum ‘Mandaianum’ (Variegated with creamy white edges)
2. Ideal Growing Conditions:
- Light:
- Prefers bright, indirect light but can tolerate moderate to low light
- Avoid direct sunlight, as it can scorch the leaves
- Chlorophytum can adapt to lower light but may not produce as many offshoots or “babies”
- Temperature:
- Thrives in temperatures between 60°F–80°F (16°C–27°C)
- Avoid temperatures below 50°F (10°C), as Spider Plants are sensitive to cold drafts
- Humidity:
- Tolerates average indoor humidity but benefits from slightly higher humidity levels
- If air is too dry, especially during winter, misting or using a humidity tray can be helpful
- Soil:
- Well-draining, loamy soil is best
- A standard indoor potting mix is sufficient, but adding perlite can improve drainage
3. Watering and Fertilizing:
- Watering:
- Water when the top 1-2 inches of soil are dry
- Avoid letting the plant sit in water to prevent root rot; ensure the pot has proper drainage
- In winter, reduce watering frequency as the plant’s growth slows down
- Tap water with fluoride can cause brown leaf tips; consider using distilled or non-fluoridated water if this is a concern
- Fertilizing:
- Fertilize during the growing season (spring and summer) every 4-6 weeks with a balanced, liquid houseplant fertilizer
- Reduce or stop fertilizing in fall and winter when the plant is not actively growing
- Over-fertilizing can cause leaf burn, so use fertilizer sparingly
4. Common Issues and How to Solve Them:
- Yellowing Leaves:
- Causes: Overwatering, underwatering, or nutrient deficiencies
- Solutions: Adjust watering routine, ensure well-draining soil, and check for root rot
- Brown Leaf Tips:
- Causes: Low humidity, fluoride sensitivity (from tap water), or underwatering
- Solutions: Increase humidity, use distilled water, and ensure consistent watering
- Spiderettes Not Growing:
- Causes: Insufficient light or lack of nutrients
- Solutions: Move the plant to a brighter spot, increase feeding during the growing season
- Leggy Growth:
- Causes: Too little light or overwatering
- Solutions: Move to a location with more light, cut back leggy stems to encourage new growth
- Pests:
- Common pests: Mealybugs, aphids, spider mites, and scale
- Treatment: Wipe leaves with a damp cloth, use insecticidal soap, or neem oil to control infestations
5. Pruning and Shaping:
- Why Prune Spider Plants?
- Pruning helps control size, removes dead or damaged leaves, and encourages bushier growth
- Cutting back long, leggy stems can stimulate new growth and more offshoots (babies)
- When to Prune:
- During the growing season (spring through summer) to promote healthy growth
- Prune any brown or damaged leaves immediately to keep the plant looking tidy
- How to Prune:
- Use sharp, clean scissors to trim dead or leggy leaves
- Cut back any overly long stems that are not producing “babies” to encourage a fuller plant
6. Repotting and Potting:
- When to Repot:
- Repot Spider Plants every 1-2 years or when the plant becomes root-bound
- Signs that it’s time to repot: Roots growing through drainage holes, slow growth, or a top-heavy plant
- Best Potting Tips:
- Choose a pot that’s 1-2 inches larger in diameter than the current one to encourage healthy root growth
- Ensure the new pot has drainage holes to prevent root rot
- Use a well-draining potting mix (standard indoor mix with added perlite works well)
- Repotting Steps:
- Gently remove the plant from its pot, check for any rotting or compacted roots, and trim as needed
- Place the plant in the new pot and fill around the roots with fresh potting soil
- Water thoroughly after repotting, but avoid overwatering in the following weeks
7. Propagation of Spider Plants:
Spider plants (Chlorophytum comosum) are one of the easiest and most popular houseplants to propagate. They produce “pups” or baby plants that grow from runners, making them an excellent choice for beginners. Here’s a step-by-step guide to propagate your spider plant:
Step-by-Step Instructions to Propagate Spider Plants
Materials Needed:
- A mature spider plant with healthy pups (baby plants)
- A sharp pair of scissors or pruning shears
- A small container or pot with drainage holes
- Well-draining potting mix (for example, a general houseplant mix with perlite or sand)
- A cup of water or a small pot (for rooting the pups)
- Optional: Rooting hormone (not necessary, but it can help encourage faster rooting)
Step 1: Choose Healthy Pups
Spider plants send out long, arching runners (called stolons) that develop smaller plantlets or pups at the ends. Look for pups that are green and healthy with visible roots or a noticeable start of root development. These are the best candidates for propagation.
- Tip: Pups should ideally be 2–4 inches long and have some small white roots visible. If the pups have no visible roots, you can still propagate them but will need to be more patient.
Step 2: Cut the Pup from the Parent Plant
Using clean, sharp scissors or pruning shears, carefully cut the pup from the main plant at the base of the runner. It’s best to make the cut just below the pup, but leaving a small portion of the runner attached will help the pup establish roots more easily.
- Tip: If the pup is still attached to the mother plant but has roots, you can also propagate it by simply placing the pup in water or soil without cutting it off immediately. However, if you want to speed up the process, it’s usually better to separate the pup.
Step 3: Rooting the Pup (Water Method)
While there are a few ways to propagate spider plant pups (in soil or water), the water method is one of the easiest and most effective for beginners.
- Place the Pup in Water: Take the pup and place it in a small cup of water. Ensure that the roots are submerged, but the leaves are not. Use clear glass or plastic so you can monitor the growth of the roots.
- Tip: If the pup doesn’t have visible roots, it’s okay. Just place it in the water, and new roots will begin to develop after a few weeks.
- Change the Water Regularly: Change the water every few days to keep it fresh and to prevent rot from developing.
- Wait for Roots to Develop: The pup should begin to develop roots within 1–3 weeks, depending on the conditions. The longer you leave the pup in water, the stronger the roots will be. Once the roots are about 1–2 inches long, it’s ready to be potted into soil.
Step 4: Rooting the Pup (Soil Method)
Alternatively, if you prefer to skip the water stage and pot the pup directly into soil, follow these steps:
- Prepare the Pot and Soil: Fill a small pot with well-draining potting mix. Use a mix designed for houseplants, or create your own with a combination of regular potting soil, perlite, and a little sand for extra drainage.
- Plant the Pup: If the pup has small roots, gently press it into the soil, burying the roots about 1 inch deep. If it doesn’t have visible roots yet, you can press the pup into the soil as deeply as needed to keep it stable, but the roots will develop over time.
- Water Lightly: Water the soil lightly to settle it around the pup, but avoid soaking the soil. Keep the soil just slightly moist, not wet.
- Create a Humid Environment (Optional): To increase humidity and help the pup establish roots faster, you can cover the pot with a clear plastic bag or plastic wrap (creating a mini greenhouse). Just make sure to poke small holes for ventilation.
- Place in a Warm, Bright Spot: Place the pot in a bright spot with indirect light, keeping it out of direct sun to avoid scorching the tender leaves. Temperatures between 60°F to 75°F (16°C to 24°C) are ideal for rooting.
Step 5: Transplant the Rooted Pup
Once the pup has developed healthy roots (in water or soil), it’s time to move it to a permanent pot or a more substantial container.
- Prepare the New Pot: Select a small pot (1–2 inches larger than the current root ball) with drainage holes.
- Fill the Pot with Soil: Use well-draining potting mix, and make a small hole in the center for the roots of the pup.
- Plant the Pup: Gently remove the rooted pup from the water or its initial pot and place it into the new pot. Fill the hole with more soil, ensuring the roots are covered.
- Water the Plant: Water lightly, ensuring the soil is evenly moist but not soggy. Continue to care for the plant with regular watering (when the soil is dry to the touch) and light.
Step 6: Ongoing Care for the New Plant
- Light: Place the newly potted pup in a bright spot with indirect sunlight. Avoid direct sunlight until the plant is more established.
- Watering: Keep the soil lightly moist but avoid waterlogging. Water when the top 1–2 inches of soil dry out.
- Humidity: Spider plants prefer average humidity, but they will grow better in higher humidity. Keep the plant in a warm, humid environment, especially if you live in a dry area.
Step 7: Enjoy Your New Spider Plant!
Your new spider plant should begin to grow and thrive in its new pot. Over time, it may even produce its own pups, which you can continue to propagate!
Additional Tips:
- Rooting Hormone (Optional): While not necessary, you can dip the ends of the pups in rooting hormone before planting them in soil to encourage faster root growth.
- Dividing the Parent Plant: If your parent spider plant has several runners with pups attached, you can also divide the plant into sections, each with its own roots, and repot them into separate containers.
Spider plants are incredibly easy to propagate through their pups. Whether you choose the water method or soil method, the process is straightforward and rewarding. By following these steps, you’ll soon have a thriving collection of spider plants to share or enjoy around your home.
8. Benefits of Owning Spider Plants:
- Air Purification:
- Known for their ability to purify the air by removing toxins like formaldehyde and xylene
- Ideal for improving indoor air quality, especially in homes or offices
- Low Maintenance:
- Spider Plants are hardy and adaptable, making them perfect for beginners or those with busy lifestyles
- They can tolerate a range of lighting and watering conditions
- Aesthetic Appeal:
- Their arching green leaves and cascading offshoots make them an attractive addition to any home décor
- Works well in hanging baskets, shelves, or as tabletop plants
9. Fun Facts About Spider Plants:
- Named for the “Spiderettes”: The name “Spider Plant” comes from the small plantlets that dangle from long stems, resembling spiders
- Historical Significance: Spider Plants are often considered symbols of fertility and prosperity, as they produce numerous offshoots
- Non-Toxic to Pets: Unlike many other houseplants, Spider Plants are safe for pets, including cats and dogs
- Resilient Nature: Spider Plants are tough plants that can bounce back from neglect, making them perfect for those new to plant care
10. Additional Resources:
Here are some reputable websites where plant owners can find specific information on spider plant care:
1. The Spruce
- Website: www.thespruce.com
- Why it’s reputable: Known for providing clear, easy-to-follow plant care guides written by experts. The Spruce offers in-depth care instructions for spider plants, including light, watering, and common issues.
2. Gardening Know How
- Website: www.gardeningknowhow.com
- Why it’s reputable: Offers practical and comprehensive plant care tips. The site has a dedicated section for spider plants, covering everything from planting to troubleshooting common problems.
3. Royal Horticultural Society (RHS)
- Website: www.rhs.org.uk
- Why it’s reputable: The RHS is a well-established authority in horticulture, offering research-backed advice on plant care. It includes spider plant care tips for both indoor and outdoor settings.
4. Better Homes & Gardens
- Website: www.bhg.com
- Why it’s reputable: Known for its lifestyle content, BHG provides thorough plant care articles, including a focus on common houseplants like spider plants, with simple steps for care and maintenance.
5. Plant Care Today
- Website: www.plantcaretoday.com
- Why it’s reputable: A website dedicated to plant care, offering detailed, step-by-step care guides for a wide variety of houseplants, including spider plants. It’s useful for both beginners and experienced plant owners.
6. Costa Farms
- Website: www.costafarms.com
- Why it’s reputable: A well-known grower and supplier of houseplants, Costa Farms provides practical care information on their plants, including spider plants, with simple, reliable tips.
7. University of Illinois Extension
- Website: www.extension.illinois.edu
- Why it’s reputable: Provides scientifically backed, research-based plant care advice, including recommendations for indoor plants like spider plants. It’s a trusted source for horticultural guidance.
8. PlantSnap
- Website: www.plantsnap.com
- Why it’s reputable: PlantSnap offers a wide range of plant identification and care tips, including comprehensive information on common houseplants like the spider plant.
9. The Sill
- Website: www.thesill.com
- Why it’s reputable: A well-known online plant shop with an excellent blog that offers care tips for houseplants like spider plants. The site is known for its easy-to-understand advice on growing and caring for plants.
10. MyDomaine
- Website: www.mydomaine.com
- Why it’s reputable: Known for its home décor and plant care content, MyDomaine offers tips for houseplant owners, including spider plant care, with a focus on making plant ownership simple and stylish.
These websites are excellent resources for learning how to care for your spider plant, from basic watering and lighting requirements to troubleshooting common problems and understanding the plant’s unique needs.
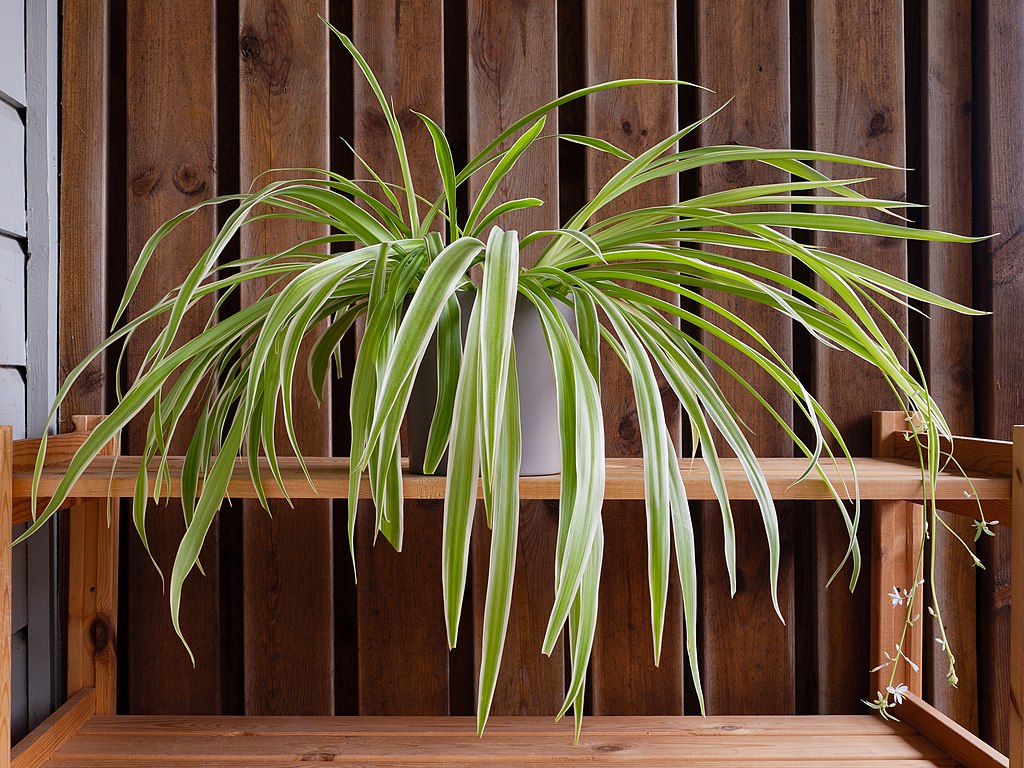
Featured image photo credit: W.carter, CC0, via Wikimedia Commons