

1. Botanical Details and Varieties:
- Botanical Information:
- Genus: Zamioculcas (Family: Araceae)
- Native to Eastern Africa (Kenya, Tanzania, and Zanzibar)
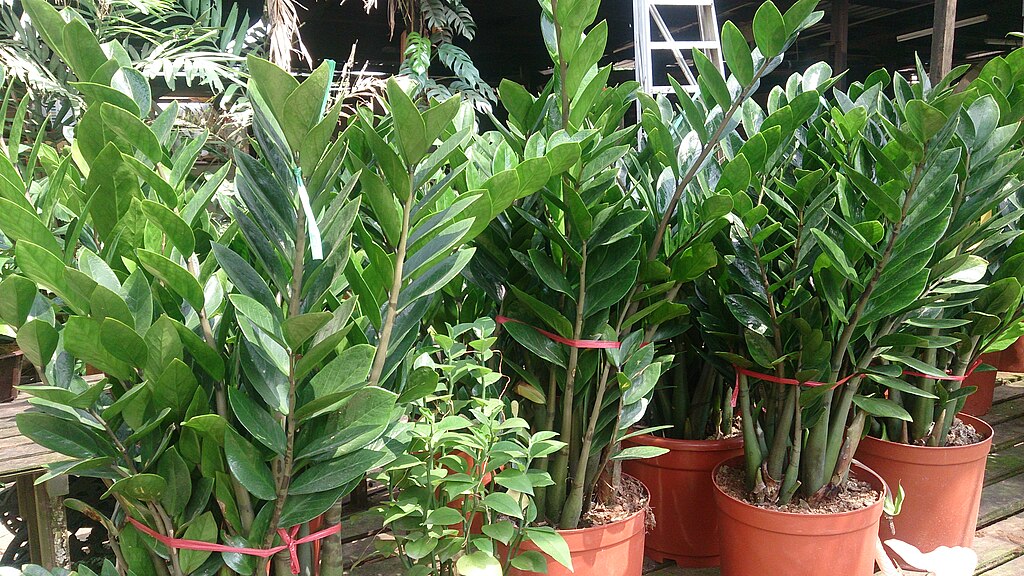
- Characterized by its thick, glossy, dark green leaves that grow from underground rhizomes
- Popular Varieties:
- Zamioculcas zamiifolia (Common ZZ Plant)
- ZZ ‘Raven’ (A dark, almost black-leafed variety)
- ZZ ‘Zenzi’ (Compact, smaller variety with thicker, more rounded leaves)
2. Ideal Growing Conditions:
- Light:
- Thrives in bright, indirect light but can tolerate low light and is often grown successfully in office environments with fluorescent lighting
- Avoid direct sunlight as it can scorch the leaves
- Tolerates a range of light conditions, making it perfect for areas with less natural light
- Temperature:
- Ideal range: 60-75°F (15-24°C)
- Avoid temperatures below 50°F (10°C); ZZ plants are sensitive to cold drafts and frost
- Humidity:
- Tolerates low humidity, making it an excellent choice for dry indoor environments
- No need for extra humidity or misting, unlike many tropical houseplants
- Soil:
- Well-draining, lightweight potting mix (cactus or succulent mix works well)
- Slightly acidic to neutral pH (6.0–7.0)
- Important to use well-draining soil to avoid waterlogging and root rot
3. Watering and Fertilizing:
- Watering:
- Water when the top 2-3 inches of soil are dry to the touch
- Tolerates drought, so err on the side of underwatering to avoid root rot
- Overwatering is the most common cause of ZZ Plant problems (yellowing leaves, mushy stems)
- Tips for watering: Make sure the pot has drainage holes to prevent water from accumulating at the bottom
- Fertilizing:
- Fertilize sparingly during the growing season (spring and summer) with a diluted balanced liquid fertilizer
- Reduce or stop fertilizing in fall and winter when the plant is dormant
4. Common Issues and How to Solve Them:
- Yellowing or Drooping Leaves:
- Causes: Overwatering, poor drainage, too much direct sunlight
- Solutions: Adjust watering habits, check the roots for rot, and move the plant to a location with indirect light
- Brown Tips on Leaves:
- Causes: Low humidity, underwatering, or exposure to cold drafts
- Solutions: Increase humidity around the plant, avoid underwatering, and keep the plant away from drafts
- Leggy or Sparse Growth:
- Causes: Insufficient light or overcrowding
- Solutions: Move the plant to a brighter spot, and prune back any overly long or spindly stems
- Pests:
- Common pests: Mealybugs, scale, aphids, and spider mites
- Treatment: Use neem oil, insecticidal soap, or wipe the leaves with a damp cloth to remove pests
5. Pruning and Shaping:
Pruning a ZZ plant (Zamioculcas zamiifolia) is a simple and effective way to maintain its health, shape, and overall appearance. ZZ plants are known for their glossy, waxy leaves and low maintenance, but occasional pruning can help encourage healthy growth and remove any unsightly or damaged stems.
Here’s a step-by-step guide on how to prune your ZZ plant:
1. Gather Your Tools
Before you start, make sure you have the right tools for the job:
- Sharp pruning shears or scissors (clean and sharp tools are important to prevent damaging the plant or spreading disease)
- Rubbing alcohol or disinfectant wipes (to sterilize your tools)
- Gloves (optional, but recommended, especially if you’re handling large or spiky stems)
2. Inspect the ZZ Plant
Take a close look at your ZZ plant to identify the areas that need pruning. Look for:
- Dead or yellowing stems: These can be removed to improve the plant’s appearance and overall health.
- Damaged or broken stems: If a stem has snapped or is badly bent, it’s best to remove it to allow the rest of the plant to thrive.
- Overgrown or leggy stems: If the plant is becoming too tall or sparse, you may want to trim it back for a fuller, more compact appearance.
3. Sterilize Your Pruning Tools
Sterilizing your tools helps prevent the spread of disease or pests. Simply wipe the blades of your pruning shears with rubbing alcohol or disinfectant wipes to ensure they’re clean before you begin.
4. Trim Dead or Yellowing Stems
- Locate any yellowing or dead stems: These often appear near the base or middle of the plant and should be removed to prevent them from taking up energy that could be used by healthier parts of the plant.
- Cut them close to the base: Using your sharp shears, cut the yellowing or dead stems near the soil line. Make a clean cut, leaving no stubs behind. If the stem is soft and mushy, it may be affected by rot, so be sure to remove it entirely.
5. Remove Damaged or Broken Stems
- If you notice any stems that are damaged or broken, carefully cut them off just above the soil line.
- For a cleaner look, remove entire stems if they’ve lost too many leaves or look unhealthy. Cut them where they meet the soil, ensuring you don’t accidentally damage nearby healthy stems.
6. Prune Overgrown or Leggy Stems
- If your ZZ plant is getting too tall or spindly, trim back the longest, leggy stems to encourage new, bushier growth.
- Cut the stem just above a leaf node (the point where a leaf is attached to the stem). This will encourage new growth from the cut area, helping to fill out the plant.
- When pruning multiple stems, try to create a balanced look by trimming evenly across the plant.
7. Dispose of the Pruned Parts
After pruning, dispose of the removed stems and leaves by placing them in your compost bin or trash. You can also propagate healthy stem cuttings (see below) by allowing them to callous over for a day or two before planting.
8. Water and Care for the Plant
After pruning, your ZZ plant may benefit from a light watering, but avoid over-watering. ZZ plants are relatively drought-tolerant, so make sure the soil is dry before watering. Keep the plant in its usual location with indirect light and continue regular care. Over the next few weeks, you may notice new growth emerging from the pruned areas!
Final Thoughts on Pruning a ZZ Plant
Pruning a ZZ plant is straightforward, and it helps keep the plant looking its best. Whether you’re removing dead stems, shaping your plant, or encouraging new growth, the process is simple and rewarding. Regularly prune your ZZ plant to maintain its sleek, sculptural appearance and promote its overall health.
6. Repotting and Potting:
- When to Repot:
- Signs the ZZ Plant needs repotting: Outgrowing its pot, becoming root-bound, or slowing growth
- Typically, ZZ Plants need repotting every 2-3 years
- Best Potting Tips:
- Choose a pot 1-2 inches larger than the current one to allow room for growth
- Ensure the new pot has drainage holes to prevent root rot
- ZZ Plants grow slowly, so they don’t need frequent repotting
- Repotting Steps:
- Carefully remove the plant from its pot, inspect the roots for rot, and refresh the soil
- Add fresh, well-draining potting mix and settle the plant into its new home
7. Propagation of ZZ Plant:
Propagating a ZZ plant (Zamioculcas zamiifolia) is a relatively easy and rewarding process that allows you to grow new plants from the existing one. There are two primary methods for propagating ZZ plants: stem cuttings in soil and stem cuttings in water. Both methods work well, but propagating in soil tends to be faster.
Here’s a step-by-step guide for both methods of propagation:
Method 1: Propagating ZZ Plant from Stem Cuttings in Soil
1. Gather Your Tools
Before you begin, make sure you have all the necessary tools:
- Sharp, sterilized scissors or pruning shears (to cut cleanly and avoid spreading disease)
- A small container or pot with drainage holes
- Well-draining potting mix (a cactus or succulent mix is ideal, or you can mix regular potting soil with perlite)
- Rooting hormone (optional but can help encourage faster root growth)
- Plastic bag or plastic wrap (optional, to create humidity)
2. Select and Cut a Healthy Stem
- Choose a healthy, mature stem with at least one or two leaves. You want to ensure the cutting is strong enough to develop roots.
- Cut the stem just below a leaf node (where the leaf attaches to the stem) using sterilized scissors or shears. Make a clean cut to avoid any damage.
- If you cut a longer stem, you can divide it into smaller sections, but make sure each section has at least one leaf.
3. Let the Cutting Callous (Optional)
- After cutting, allow the stem to callous over for about 1-2 days. This helps to prevent rot and gives the cutting time to form a protective layer on the cut end.
- Place the cutting in a dry, shaded area during this time.
4. Prepare the Potting Mix
- Fill a small container with well-draining potting mix. You can use a cactus or succulent mix, or make your own by adding perlite to regular potting soil for extra drainage.
- If you’re using rooting hormone, dip the cut end of the stem into the powder and tap off any excess before planting it into the soil.
5. Plant the Cutting
- Insert the cut end of the stem into the prepared potting mix. Bury it about 1-2 inches deep, ensuring the cutting is stable.
- Lightly press the soil around the cutting to hold it in place.
6. Water and Create Humidity
- Gently water the cutting to settle the soil. ZZ plants don’t like to be too wet, so make sure the soil is just slightly moist, not soggy.
- To maintain humidity around the cutting, you can cover the pot with a plastic bag or plastic wrap. This helps to retain moisture while the cutting establishes roots.
- Place the pot in a warm location with bright, indirect light. Avoid direct sunlight, as it can scorch the cutting.
7. Wait for Roots to Form
- Over the next 4-8 weeks, the cutting will begin to develop roots. You may see new growth (small shoots or leaves) emerging from the top of the cutting, which is a sign that it is rooting successfully.
- Check the cutting periodically to ensure the soil stays lightly moist. Once the roots are well-established, you can remove the plastic covering and treat it like a mature ZZ plant.
8. Transplanting the Rooted Cutting (Optional)
- After 2-3 months, the cutting should have a strong root system. You can transplant it into a larger pot with the same type of well-draining soil as your parent plant.
Method 2: Propagating ZZ Plant from Stem Cuttings in Water
1. Gather Your Tools
You’ll need:
- A clean jar or glass (large enough to hold the cutting and water)
- Sharp, sterilized scissors or pruning shears
- Filtered or room-temperature water
- Rooting hormone (optional)
2. Select and Cut a Healthy Stem
- Choose a healthy stem with a leaf or two and cut it just below a leaf node, similar to the soil propagation method.
- If the stem is long, you can cut it into smaller sections, but each section should have at least one leaf attached.
3. Place the Cutting in Water
- Put the cutting in a jar or glass of filtered water. Ensure the cut end is submerged but that the leaves are not in the water.
- Place the jar in a warm area with bright, indirect light, avoiding direct sunlight that might overheat the water and harm the cutting.
4. Change the Water Regularly
- Change the water every few days to keep it clean and prevent mold or bacteria buildup.
- You may also add a few drops of liquid houseplant fertilizer to the water once the roots start forming (about 4-6 weeks in).
5. Wait for Roots to Form
- Over the next 4-8 weeks, the cutting will develop roots. Once the roots are at least 2-3 inches long, you can transfer the cutting to soil. You can also wait until the roots are more established if you prefer.
6. Transplant the Rooted Cutting
- Once the cutting has developed a good root system, it’s time to transplant it into a pot with well-draining soil.
- Follow the same procedure for planting in soil as outlined in Method 1.
Tips for Success
- Patience is Key: ZZ plants are relatively slow growers, so be patient during the propagation process. It may take a few months for your cutting to develop enough roots and new growth.
- Humidity: Keeping the cuttings in a humid environment helps them root more successfully. A plastic bag over the cutting or a humidity dome can help retain moisture.
- Avoid Overwatering: ZZ plants are drought-tolerant and can suffer from root rot if watered too frequently. Keep the soil moist but not soggy.
- Propagation in Soil vs. Water: Propagating in soil tends to be faster and results in more reliable long-term growth. However, water propagation can be more visually satisfying, as you can observe root development.
8. Benefits of Owning ZZ Plant:
- Air Purification:
- ZZ Plants are part of NASA’s Clean Air Study and are known for their ability to purify indoor air by removing toxins like benzene, xylene, and toluene
- Aesthetic Appeal:
- ZZ Plant’s glossy, dark green leaves and architectural form make it a stylish addition to any space, from modern to minimalist décor
- Perfect for low-light spaces, such as offices, bathrooms, or hallways
- Low Maintenance:
- One of the most forgiving houseplants, making it an ideal choice for beginners or people with busy schedules
- Thrives with little attention, and can go weeks without watering
9. Fun Facts About ZZ Plant:
- Symbolism:
- In many cultures, ZZ Plants are thought to bring good luck and prosperity, making them great gifts
- Durability:
- The ZZ Plant is known for its durability and long life span, often surviving in difficult conditions that other plants cannot tolerate
- Native to Africa:
- ZZ Plants are native to the dry, arid regions of Eastern Africa, where they have adapted to survive with minimal water and in low-light conditions
Credit for featured image of ZZ Plant: Mokkie, CC BY-SA 3.0 https://creativecommons.org/licenses/by-sa/3.0, via Wikimedia Commons